adam518 Posted January 9, 2012 Share Posted January 9, 2012 Well...I finally began disassembly of my '91 this weekend. I bought it back in September and have been driving it a few days a week and fixing small things along the way while I accumulated most the parts I needed for my build. Here is what I am starting with: 1991 2wd, 4.0L, AX-15, short bed. No real options except the 4.0 & air conditioning. Standard column, bench seat, no cruise, no delay wiper. Basic, plain interior. The po had a buddy parting out a long bed MJ that had a D44. He talked him out of it, so it already has a decent rear axle. The po bought it on the cheap from a guy who let it overheat. The original motor was toast. He swapped in a jy 4.0 from a 1998 Grand Cherokee. The truck has approximately 185K miles, but the block has right at 120k. It has almost no rust (the po repaired the floor & did a good job), the body is straight and will only require minor work to make it perfect. Everything works, it runs great, tracks & stops straight, ac blows icy cold...now what better than to tear it all apart. Here's my plan: convert to 4wd regear axles to 4.56 4.5" of lift, spring under 32x11.50 tires TJ Ravine wheels (hyper black) '97 front header panel & fender swap replace bench with bucket seats & add a center console repaint (leaning towards a medium gray/silver metallic) replace windshield with '97 up style & install new rear slider Basically, I am hoping my truck will look similar to Rymanrph's rescue green truck, except in silver. I'll run a little more lift and 32's, but it is still the basic look I am shooting for. Also, to keep it somewhat simple, I plan to use the original interior for the most part, but I have already removed everything but the dash and re-dyed all of the pieces. Parts aquired for suspension/drivetrain: Hell Creek 4.5" rear springs Rubicon Express 4.5" front coils Rubicon Express LCA's Rock Krawler UCA's Rock Krawler adjustable trac bar Bilstein 5100 front & rear shocks Novak transfer case shifter cable kit JB Conversions sye kit '96 hi-pinion XJ front axle (297 u-joints) '94 XJ AX15, bellhousing & 231 transfer case Advance Adapters clutch slave cylinder & braided line I'm sure there more but that is all I can think of at the moment. This weekend, I cleaned it up, pulled it into my warehouse at work, removed the front suspension and basically got everything organized to move forward. I am somewhat limited as far as how much time I can spend on this project at a time. I have a 4 year old and a two year old and they keep me pretty busy. I should be able to wrench an hour or two every evening after work, but that's about it for now. Unfortunately, I don't have the space needed to do the work at home. Here it is for now: Link to comment Share on other sites More sharing options...
adam518 Posted January 9, 2012 Author Share Posted January 9, 2012 Tonight I was able to remove the rear bumper and loosen, but not remove, the leaf spring bolts. I didn't have enough time to properly remove the rear axle, so I left the bolts in the end of the springs. After getting my bumper off, it looks worse than I thought, but I still think it can be repaired. The end caps & top plastic pieces are good, it just needs a lot of straightening. Link to comment Share on other sites More sharing options...
89Comanche4x4 Posted January 10, 2012 Share Posted January 10, 2012 looks like a very clean truck!! has it been painted? Link to comment Share on other sites More sharing options...
adam518 Posted January 10, 2012 Author Share Posted January 10, 2012 looks like a very clean truck!!has it been painted? Thanks. As far as I can tell, it is the original paint, but it has faded to almost flat black. When I first brought it home, it had a pinstripe that was so deteriorated that it looked like morse code. Link to comment Share on other sites More sharing options...
cody4359 Posted January 11, 2012 Share Posted January 11, 2012 if it is a zj motor check the brackets. late 98 they changed how the block mounts are located. mine has a late 98-early 99 zj block and on the passanger side one bolt was holding it on with a TJ motor mount bracket lol nice score, id love a 91-92 Link to comment Share on other sites More sharing options...
adam518 Posted January 11, 2012 Author Share Posted January 11, 2012 if it is a zj motor check the brackets. late 98 they changed how the block mounts are located. mine has a late 98-early 99 zj block and on the passanger side one bolt was holding it on with a TJ motor mount bracket lol nice score, id love a 91-92 I'll check that out. The ZJ motor came from a jy. It still has the yellow marker on the valve cover saying it is out of a 1998 Grand Cherokee and the mileage. It's funny, but this little truck seems really strong. I also have a '97 XJ that my wife bought new. It is a 4.0L AW4 with 4.56 gears on 33's. The MJ currently has 3.07 gears and 28" tall tires. The MJ has tons better acceleration even with the taller gearing. I know it's lighter, but there has to be more to it. The best I can figure is that the AW4 is a power hog. I've read they aren't overly efficient, but geese, my MJ feels like a hot rod compared to the XJ. The AX15 has a deeper 1st gear, but the MJ feels stronger at pretty much any rpm and any gear. I've done some seat of the pants comparisons at highway speed with the XJ in drive (1:1) and the MJ in 4th (1:1) and the MJ wins hands-down. Tonight I got the rear suspension removed. It went pretty smooth except for one bolt. The front leaf spring bolt on the driver's side seized in the bushing. The nut was easy enough to get off but the bolt wouldn't come out because it was married to the inner sleeve of the bushing. I had to cut the head and tip off the bolt and spread the leaf spring pocket slightly to get the spring out. Now that I have both axles out, it's time to regear. Since this truck is only going to be on 32's, I had planned all along to run 4.10's, but what the heck, too much gear is better than not enough...I am going 4.56. 4.56 gears should give me a little better crawl ratio and besides the MJ will not see long drives at anything of 65-70 mph anyway. Since I forgot to take pics of my progress, here's a couple pics of my XJ...hope XJ's are tolerated here. Link to comment Share on other sites More sharing options...
cody4359 Posted January 11, 2012 Share Posted January 11, 2012 the mj is alot lower and better aerodynamics then that lifted xj with a roof rack, and has WAY lighter tires/wheels for rotational mass. i think i weighted my cooper 33" in at 90-100lbs each ( i have a horrible memory) the xj looks pretty good Link to comment Share on other sites More sharing options...
camjeep3 Posted January 11, 2012 Share Posted January 11, 2012 we can put up with xjs :D especially that one. I like it alot Link to comment Share on other sites More sharing options...
adam518 Posted January 13, 2012 Author Share Posted January 13, 2012 OK...Both axles out and taken down to where they can be disassembled completely, stripped, regeared and reassembled. My only experience with a rear solid axle was with my XJ, which has the Chrysler 8.25 and uses c-clips. I assumed that the D44 axles would slide out easy once the retainer plate was removed...geese was I wrong. I read to flip the drum and barely install the lug nuts onto the ends of the wheel studs, giving you enough room to jerk the drum and essentially use the drum as a slide hammer...no dice. I ended up installing my old spare tire, which won't be needed anyway, and beat the living crud out of the back of it to free the axles. All is well now. The last pic is of my newly straightened bumper. Once removed, it was in much worse shape than I thought. I was afraid that it was beyond repair. Knox Custom Chrome straightened it out for $100 and they had it fixed in 1 day. I had them straighten, grind & repair, but not refinish the bumper. I am undecided whether to powder coat or paint it. It will probably be painted to make touch-ups easier down the road. Link to comment Share on other sites More sharing options...
A-man930 Posted January 22, 2012 Share Posted January 22, 2012 lookin good!! I'm also in the "can't spend too much time on my play toys" camp. Priorities man, but we can still have our fun :thumbsup: Link to comment Share on other sites More sharing options...
Rymanrph Posted January 22, 2012 Share Posted January 22, 2012 The truck is looking good so far. The more I look at my truck the more I am inclined to go the direction you're going in - a little more lift and a little more tire. I'll be watching your progress. Link to comment Share on other sites More sharing options...
adam518 Posted January 22, 2012 Author Share Posted January 22, 2012 lookin good!! I'm also in the "can't spend too much time on my play toys" camp. Priorities man, but we can still have our fun :thumbsup: So far I've spent about an hour or so a night, from 5:00 to 6:00 or 6:30, working on my rig. The wife hasn't complained...too much. Anyway, I feel as long as I keep moving forward I'll get it done in a reasonable timeframe. No new pics the last few days because I have basically been tearing down the axles. There's not really a whole lot to show there. I have to go out of town from the middle of this week to the middle of next, but hopefully I'll be putting the suspension back in at that point. Link to comment Share on other sites More sharing options...
adam518 Posted January 22, 2012 Author Share Posted January 22, 2012 The truck is looking good so far. The more I look at my truck the more I am inclined to go the direction you're going in - a little more lift and a little more tire. I'll be watching your progress. My XJ went up in steps. You could say I got "inchitis".1.) RE 3.5" superflex lift with 31x10.50's.2.) Added ACOS to the front & shackle relocation to the rear, netting right at 5.25" and swapped in 32x11.50's.3.) I wanted to got to 33x12.50's, but the back tires would rub the front of the rear flares. I made a .25" spacer to add to the rear leaf...basically like another short leaf that had a locating hole for the spring center pin and an allen head bolt inserted .75" to the rear. The allen head now goes in the spring perch, moving my axle back .75" to the rear. Anyway, the spacer added another 1/4" of lift, so the front ACOS were adjusted to match. It now sits at 5.75" and rides on 33x12.50's.The XJ went from stock 3.55 gears on 31's, to 4.10's on 31's, to 4.10's on 32's, to 4.56's on 32's, to 4.56 gears on 33's. I drive about 10 miles each direction to and from work. About half of it stop and go from redlight to redlight and half on a 5.5 mile stretch of open highway that is up and down long hilly grades. For my needs, the 4.56 gears and 32's were optimum. FWIW, the XJ does have an AW4 which is a little bit of a power-robber.IMHO, my XJ was best all-around on 32's. I like the look of the 33's & probably won't go backwards, but I really want to make the MJ a good looking, good wheeling, good driving rig that is somewhat practical. Besides, the wife was sold on the MJ because of its utility, like picking up a load or two of mulch, etc. I could still do that lifted to the moon, but who wants to be shoveling mulch out of a bed over your head. lol Link to comment Share on other sites More sharing options...
adam518 Posted January 24, 2012 Author Share Posted January 24, 2012 The truck is looking good so far. The more I look at my truck the more I am inclined to go the direction you're going in - a little more lift and a little more tire. I'll be watching your progress. BTW, your rig has been the inspiration for my build...very beautiful truck! I hope I end up with something as nice as yours. Link to comment Share on other sites More sharing options...
Guanaco.13 Posted January 24, 2012 Share Posted January 24, 2012 What front bumper is on your xj Link to comment Share on other sites More sharing options...
adam518 Posted January 24, 2012 Author Share Posted January 24, 2012 What front bumper is on your xj It is a Rigidco bumper. Their website stinks, but the bumpers kick-a. Terry makes several bumpers that aren't on their website. Mine is called a FbW2 (Front Bumper, Winch, 2nd design) Link to comment Share on other sites More sharing options...
Guanaco.13 Posted January 25, 2012 Share Posted January 25, 2012 Yeah I have been bumper shopping for a while but they are either to damn expensive :mad: or they are to Gody and rediculous but I like that bumper it looks good Link to comment Share on other sites More sharing options...
adam518 Posted January 25, 2012 Author Share Posted January 25, 2012 I was looking for something with clean & simple design and a good mounting system...I wasn't disappointed. The price was very reasonable compared to big name production line bumpers. Plus, I was a little anal about the length of my side protection as I didn't want a gap from where the bumper stopped and the flare started and Terry worked with me getting what he called the "wings" the exact length I was looking for. Also, check out jcroffroad bumpers. I like the looks of their new Crusader bumpers. The MJ will probably go winchless and I like the XJFD front bumper with built-in lights. Link to comment Share on other sites More sharing options...
Guanaco.13 Posted January 26, 2012 Share Posted January 26, 2012 jcroffroad bumpers are sick :banana: I think i found the bumper for my mj. I like the front winch bumper or the front prerunner winch bumper. :drool: Link to comment Share on other sites More sharing options...
adam518 Posted February 5, 2012 Author Share Posted February 5, 2012 Moving slow...slower than I would like. It been almost two weeks since I have been able to turn a wrench on the MJ. Yesterday, I had a couple of hours and got the trans and exhaust out. Link to comment Share on other sites More sharing options...
adam518 Posted February 22, 2012 Author Share Posted February 22, 2012 My axles are back and just about ready to install. I decided to keep the drums on the rear, but I still have to sandblast and paint the backing plates. The front is waiting on new Spicer ball joints that should be here any day. While waiting on parts, I went ahead & installed the JB Conversions sye kit. It was straight forward and the instructions were good. I do say more power :bowdown: to anyone who has done this without removing the case from the vehicle. My Cherokee has a hack-n-tap sye, which I did in the driveway. Having done both, I would recommend the hack-n-tap if you don't want to remove the transfer case, but the full conversion is really no big deal on a work bench...just get a nice set of split ring pliers. Mine weren't really as big as needed and getting the split rings in place was a major pita. If you look behind my rear axle, you can see my old shafts. They were kind of pitted at the seals and I was afraid they would leak, so I got new Ten Factory shafts. We put new bearings, seals & retainers on my old shafts so that I have spares. After slowly taking it apart for 6 weeks an hour here and an hour there, it will start going back together this weekend! Link to comment Share on other sites More sharing options...
adam518 Posted February 26, 2012 Author Share Posted February 26, 2012 Wahooooo...tranny installed!!! Yesterday, I was able to get the clutch and new pilot busing installed, the transfer case shifter installed, and painted my axles, leaf spring, shifter handle and a bunch of misc parts. Today I was able to get the trans all bolted up. It's been few years since I bench pressed a transmission in place...about twelve to be exact. At that time I swore to never go alone again...oh well. It is bolted up and all torqued down. I know it's slow going, but remember, I get 2-3 hours here and there...try to post pics tomorrow. Link to comment Share on other sites More sharing options...
adam518 Posted March 12, 2012 Author Share Posted March 12, 2012 Got the front axle installed today. No driveshaft yet...but I have a transfer case and a front axle installed...to me that makes it a 4wd. Link to comment Share on other sites More sharing options...
A-man930 Posted March 12, 2012 Share Posted March 12, 2012 you do good clean work. Link to comment Share on other sites More sharing options...
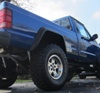
adam518 Posted March 14, 2012 Author Share Posted March 14, 2012 you do good clean work. Thanks. The rear suspension was installed yesterday. The Comanche is now sitting on it's own suspension...granted it's on jack stands instead of wheels, but at least it has it has it's weight on the new springs. After measuring, it seems as though I ended up with more than the amount of lift I was shooting for. The front was initially right at 6 1/4" of lift. I know it will settle, but I'd bet it will still end up being well over 5". I called Rubicon Express to make sure I didn't end up with 5 1/2" springs, but the confirmed that they are definitely the 4 1/2" springs. The guy told me that the would settle to 16" - 16 1/2" of compressed height. If that's true, my actual lift height with the front coils will be 5 1/4". I measured again today. The weight has been on the coils for 4 days and it has settles to 5 1/4" of lift. I measured the lift by measuring from the top of the axle tube to the bottom of the frame rail immediately above the tube. Factory should be 6 3/4" +/- 1/2" and I am getting right at 12" on both sides. Because of all the lift from the front coils, I was afraid that the rear would look too low with Hell Creek 4 1/2" rear leafs. While I haven't measured it exactly, the rear appears to have about the same amount of lift as the front. The Jeep sits almost perfectly level with jack stands set at the same height and under each axle. If it ends up somewhere in the 5" range, I may run 33's instead of the intended 32's...who knows, but I do have one concern. The height has my control arms at a more dramatic angle than I had anticipated. Once you go over 4" to 4 1/2", every little bit of additional lift makes a big difference with short arms. I am considering a CAD or possibly even a long arm kit to get a better ride. With my XJ, I went with the Rock Road CAD kit. I know they have terrible press for customer service and lead times, but I can say that after looking at all the other CAD kits out there, that I am more than pleased with the Rocky Road construction & design. The XJ flexes like crazy and rides like a champ. I've had several people tell me they couldn't believe how good it rides with mud tires and as much lift as it has. My other consideration is the Rock Krawler X Factor 3-link set up. I'v read good things about their kit, but do not have any personal experience. The only downside is that I have good RE fixed length super-flex arms from an old 3 1/3" XJ lift that will work fine with a CAD kit and brand new Rock Krawler adjustable upper control arms. If they will let me swap the new uppers toward credit for the long arm kit, I may pull the trigger, but if not, I'll probably just order the CAD and use what I have. ...will post more pics this evening of the slightly settled front and rear. BTW, anyone here have any experience regarding how much lift my Hell Creek 4 1/2" rear springs will give me after they settle? Link to comment Share on other sites More sharing options...

Recommended Posts
Create an account or sign in to comment
You need to be a member in order to leave a comment
Create an account
Sign up for a new account in our community. It's easy!
Register a new accountSign in
Already have an account? Sign in here.
Sign In Now