jpnjim Posted October 12, 2009 Posted October 12, 2009 I completely abandoned the last rear bumper idea, so I figured I'd start fresh with a new thread. Here's the bumper I've been running for the last 10 years, on 2 different MJ's: Pretty simple (used stock mounts, with a plate on the bottom of each, to mount a tow hook, and spaced at the top with 1.5"x1.5" angle iron) last pic before... chop bolted the pieces back on and used the Iron Scorpion kit: http://ironscorpion.com/zen/index.php?m ... 70a52835ee plus a YJ winch plate to make a new center for the old bumper (I know the ends are crooked :D ): Getting the Jeep level in this driveway took a floor jack, some ballast on one corner, and letting air out of the tire on the opposite side: burn it in:
jpnjim Posted October 12, 2009 Author Posted October 12, 2009 Winch goes in here: Was hoping I could keep two bolts in, and swing it down to install the winch, :idea: but :no: I couldn't get that lucky. Peek-a-boo winch: I was thinking about cutting this into the bed floor: but it looks like there's enough room to operate the in/out lever (once I trim a little more): Back & side views:
jpnjim Posted October 12, 2009 Author Posted October 12, 2009 I spaced it back 2" further than the old bumper (for protection). Actually would've been more room for the winch if I moved everything inward (would've cleared the bed reinforcements at the rear). Next I need to add some filler strips (about 2.5" per side), so I can put the ends on: MJ rear bumper needs to be ~66" wide, compared to the typical front @ ~61" I was gonna chop off the bed corners to fit the bumper ends, but now I'm on the fence, I could leave the sheetmetal, and mount the corners a little further out. There's also a ton more reinforcement to do to beef up the winch mount: and I'll be adding the receiver plate that extends to the X-brace back in the end (from the other bumper). Only other thing I'm not sure of is how I'll finish off the backside, right now the leading edge of the bumper is more like a shovel: At least the winch is well protected: and there's more room above it than it looks: FWIW, the winch (MM 8k) was a really good deal, thou I will be cleaning up that drum before it goes together permanently. I'm probably gonna order 50' of synthetic line, and call it good. :cheers:
jpnjim Posted November 1, 2009 Author Posted November 1, 2009 Thanks! I've been slacking a little (as usual), but I cleaned up the winch, reclocked the lever, and reinforced the attachments from the bumper mounts to the winch plate. Still have to cut the bed corners, and burn the bumper ends on. It came out a little heavier than I thought it would tho :ack: here it is on the scale with the (unmounted/unfinished) ends & winch cable sitting on top: 140 lbs, without the solenoid box. :doh:
jpnjim Posted November 1, 2009 Author Posted November 1, 2009 I am gonna run synthetic rope, so that should drop a few lbs off of it. Here it is slathered in POR-15, then Rustoleum Satin Black & mounted, License plate will go to left of hitch, 2 holes there are for some of those 'bolt light' license plate lights (they're not gonna be bright enough tho :ack: ): Painting the aluminum fairlead came out better than I thought (it's also POR + Rustoleum don't know how it'll hold up to the rope). If it looks bad after a few pulls I just get an anodized black fairlead instead. Side view: You can see where the bumper ends will go, I'm still trying to figure out how I want to cut the bed corners (I don't want too much of the chopped off look).
jpnjim Posted November 1, 2009 Author Posted November 1, 2009 Almost forgot, I got a couple of these 20mm ammo cans, they're a 'perfect' fit behind the wheelwells (even with a bedlner): They are a pop-top style (top unlatches ft & back, then completely comes off), but if you cut a sort of 'alignment lip' off one side, and weld the latch down, it'll function as a hinge, instead of a latch. I also welded a link from a chain inside the functioning latch, so I can put a padlock on it. The solenoid pack & winch control will go in one of these (along with the rest of the recovery gear, they're friggen huge inside), I'll mount another on the other side for tools. They're even with the inner wheelwells, so you don't really even lose any floor space.
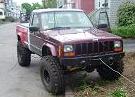
CWLONGSHOT Posted November 1, 2009 Posted November 1, 2009 Nice and funtional!!! I like it! BTW< I also like the new tires!! What size are they?? CW
jpnjim Posted November 1, 2009 Author Posted November 1, 2009 Nice and funtional!!! I like it! BTW< I also like the new tires!! What size are they?? CW Thanks! Tires are 255/85-16's They are a little under-width (should be 33 x 10, these are closer to 33x9's). If I knew they were this skinny I would've atleast thought about getting the 285/75-16's instead (285's 'should' be 32.8 x 11.2). So far they haven't gone past the end of my driveway yet, so I can't say how good/bad they are. (I'm liking the way they look on the Silverstars tho ;) )
CWLONGSHOT Posted November 1, 2009 Posted November 1, 2009 I agree the silver stars are a good looking rim!! NICE JOB!!! CW
Tri_X_Troll Posted November 1, 2009 Posted November 1, 2009 :hijack: How are you clamping your rails for your bed cover with the drop in liner?
jpnjim Posted November 1, 2009 Author Posted November 1, 2009 :hijack: How are you clamping your rails for your bed cover with the drop in liner? You can see the aluminum clamp in this pic: V The holes were there in the correct spot when I bought this bedliner, previous owner was already using it with a tonneau cover. (you can see the old cover in this pic, rolled up next to the can)
jpnjim Posted November 10, 2009 Author Posted November 10, 2009 Side view: You can see where the bumper ends will go, I'm still trying to figure out how I want to cut the bed corners (I don't want too much of the chopped off look). I've been taking my time with this, but I think I found a decent balance. since I started with a ft bumper kit, the angle for the wraparound section was totally wrong for the rear corner. I segment cut it, so I could push it back, and have less of a tree magnet: I'm planning on angling the end a little further out than the original design, to protect the corner better: Back view: I still have to trim another 1/8" off the sheetmetal, so I can level the bumper end.
tallon2064 Posted December 5, 2010 Posted December 5, 2010 Did you have to reinforce where you made the cut in the bed for the winch? :dunno: If you said what you did I must have missed it.
jpnjim Posted December 5, 2010 Author Posted December 5, 2010 I did not reinforce that edge of the bed. The plan was always to add a length of angle iron, or similar to the inside of that edge (from underneath) to beef it up, otherwise it would be a weak spot if something heavy ever was dropped right there on the rear edge of the bed. This MJ was sort of back burnered when I picked up the 'Grandpa Jeep' last January, then had to put it into daily driver mode when 'her' daily driver ZJ bit the dust a few weeks later. I'm hoping to start working on it soon (now that I finally replaced her daily driver), but we'll see how smoothly that goes. :ack:
jpnjim Posted November 17, 2012 Author Posted November 17, 2012 Hi all! I still don't have interwebs at the new house, so I've been seriously slacking in my visits here. I did get a little more work on the back bumper done tho: Cutouts to the lower left and right are flat spots for the high lift Cutout to the right also has a tow hook, I like to loop the winch line through the D-ring, and grab the hook with it Ends didn't come out as perfectly symmetrical as I wanted, but they're pretty close. The winch isn't in place right now, since there is still another under bracket/support to attach. The tailgate is just a teaser, and hopefully the pics will motivate me to finish that next. :)
Garvin Posted November 17, 2012 Posted November 17, 2012 Bumper looks pretty good, love the tail gate though. That's along the same lines as what I want to do with the tail gate but can't find one in any kind of good shape around here for a reasonable price.
jpnjim Posted November 17, 2012 Author Posted November 17, 2012 This tailgate was in rough shape The guy I got it from a had a few, back when I had a J truck I couldn't find a tailgate to save my life, so I couldn't bear to chop up a good one. I picked the worst one of the bunch :) Few more pics before it got rattle canned:
Comanche County Posted November 17, 2012 Posted November 17, 2012 The hidden winch in the rear bumper is so cool! :bowdown:
jpnjim Posted November 17, 2012 Author Posted November 17, 2012 Bumper looks pretty good, love the tail gate though. That's along the same lines as what I want to do with the tail gate but can't find one in any kind of good shape around here for a reasonable price. here's some *before* pics: rest of the 'surgery' is here: http://comancheclub...._40#entry171541 The hidden winch in the rear bumper is so cool! :bowdown: Thanks :D Cool factor played a big part :) Not having to turn around on tight trails to yank the guy behind me (assuming I ever get this thing out on a trail again ;) ) was the excuse I used to actually do it. All that's left is to chop up the underbrace from the old bumper: and attach it to the new bumper so the winch can go back in. Hopefully soon......
jpnjim Posted November 17, 2012 Author Posted November 17, 2012 Last thing, anyone know of a decent, not crappy LED strip light to illuminate the license plate, please post them up :) Something like this http://www.amazon.co..._sim_sbs_auto_2 but a little more durable.
jpnjim Posted November 16, 2013 Author Posted November 16, 2013 All that's left is to chop up the underbrace from the old bumperand attach it to the new bumper so the winch can go back in. Hopefully soon...... slight update, I did the underbrace last winter: Made a test piece in the shape I wanted: notched the real piece: fold, weld, grind & burn the whole thing on: & it's braced to the frame X member. I wanted it smooth to help drag the bumper up & over anything it might otherwise try to grab. (pay no attention to the Romex exhaust hanger bracket please :) )

Recommended Posts
Create an account or sign in to comment
You need to be a member in order to leave a comment
Create an account
Sign up for a new account in our community. It's easy!
Register a new accountSign in
Already have an account? Sign in here.
Sign In Now